No Heat? No Problem! WT?
By Steve Schaeber, MACS Technical Editor
Ugghh!! Every technician knows that feeling of simultaneous joy and sorrow when they diagnose a no heat condition being caused by a clogged or plugged up heater core. Sometimes it’s a pretty easy test, particularly when the hose going in is hot and the hose coming out is cold. This makes us happy because we can confidently report our findings to the customer, knowing the primary solution is to replace that faulty heat exchanger. At the same time though, we lament the thought of having to do the job, particularly when it’s one of those labor intensive replacements that can sometimes take several hours or even days to complete. The money’s great, but still…
Ugghh!!
That must have been exactly what this guy thought when he found a similar problem with the heater core in his 1999 Ford E-150 work van. We’re not sure, but financial issues may have also come into play in this situation.
The repair approach (while not recommended) is still an interesting one, although certainly not the most efficient way to go. Better options are out there, but for now, let’s just take a look at what was done.
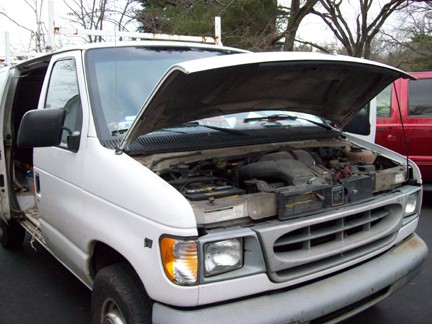
Heater core issues were chilling the driver of this
1999 Ford E-150 work van.

To avoid the arduous dashboard R&R, the heater hoses going to the core were simply cut.
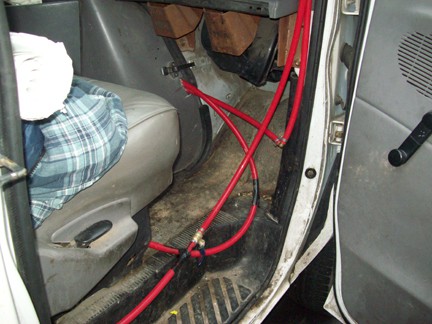
Tapping into those heater hoses, PEX lines were attached and ran
through a hole notched into the doghouse cover.
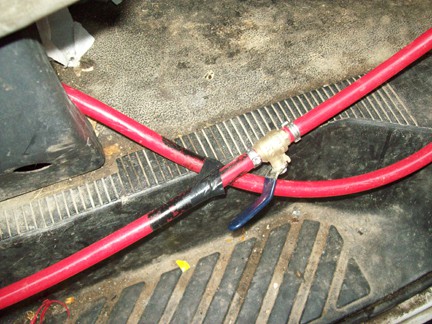
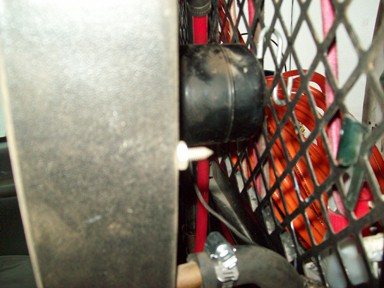
To help regulate the flow of coolant (and thereby the heat available to the cabin), this manually controlled regulator valve is installed inline along a section of the PEX tubing.
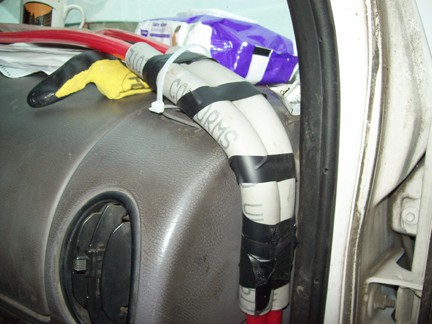
Two pieces of plastic electrical conduit help the PEX tubing make that critical bend up onto the dashboard, while also protecting it from damage in the door jamb area. A zip tie attached to the side window vent secures the assembly in place, while electrical tape fastens the supply and return lines together.

One big loop runs along the surface of the dashboard, intended to provide heat for defrosting

A loop around the driver’s seat…
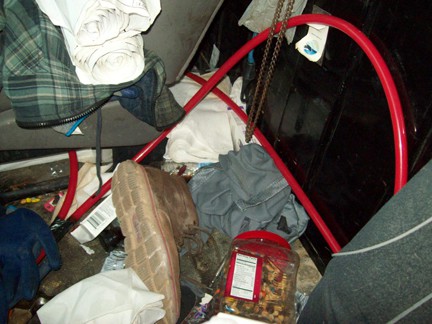
…and another around the passenger seat and between the seats.
As mentioned above, we don’t know all the details behind this repair, but did learn that this red oxygen barrier type of PEX tubing (which was left over from a prior job) is commonly used in building construction, particularly when installing radiant heat systems into newly poured concrete floors. The thought behind this job was that if PEX tubing works well in concrete, it should also work in a van.
Apparently it didn’t work out as planned though, because after driving the van for a few days it was found that not much heat would radiate off the tubing. Further modifications would be needed to actually get heat to flow. No, the heater core still wasn’t replaced, but rather an auxiliary heater unit salvaged from an old dump truck was installed, which finally did provide warm air.
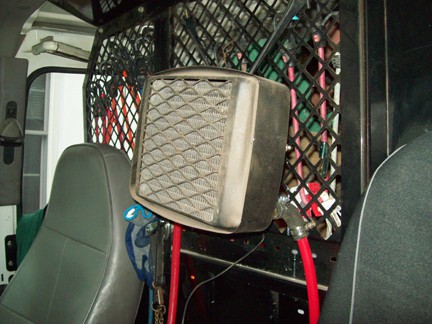
Tapping into the PEX tubing between the two seats, this auxiliary heater unit receives the flow of coolant intended for the in-dash heater core. Attaching it to the van’s divider cage with a bungee cord allows for up and down movement of the assembly to direct airflow in various positions.
Standard worm drive hose clamps were used to secure the PEX tubing to the heater. Also shown is the blower motor, which rests against the cage
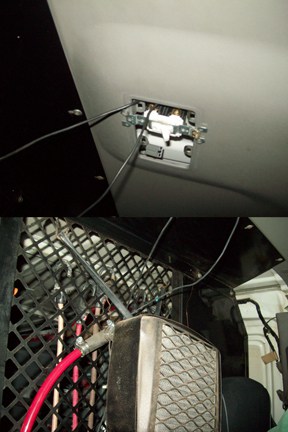
Supplying the blower motor with current, this standard wall switch is installed in the van’s ceiling at the dome light hole, secured with 1” Phillips head drywall screws.
Just for the heck of it, we checked with an online service information provider to find out what’s involved with replacing the heater core in a similar vehicle. We found a list price for a replacement core at around $250, with an estimated labor time of around 2 hours. Not too bad for a heater core, as some of them can take much longer.
Now for the disclaimer: The author of this BLOG has personal knowledge of this van and its owner, and although he wasn’t involved in the repair, he finds it fascinating to look at the things people do and to ask them “what were you thinking”? MACS nor the author recommends, condones nor participates in repairs of this nature, and ALWAYS recommends ALL repairs be performed in accordance with OEM vehicle manufacturer recommendations, service manuals, methods, procedures and/or bulletins.
What was the last crazy repair you saw? Do you know about similar repair attempts that were made? Why not share them with MACS! Send us your story, and it might just end up here on our MACS WordPress BLOG! Visit our website www.macsw.org for more information, or send an email to steve@macsw.org and let us know about it.